Ingredients
Equipment
Method
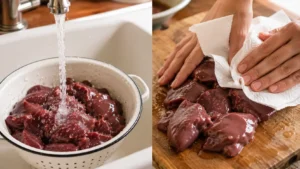
Step 1: Clean Those Livers Properly
- Rinse the chicken livers under cold water and pat them completely dry. Trim away any visible green bits or tough connective tissue; this matters more than people realize for a clean, smooth flavor.
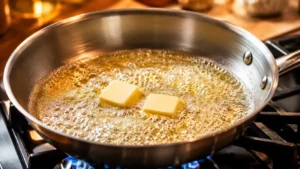
Step 2: Get Your Pan Really Hot
- Melt 2 tablespoons of butter in your skillet over medium-high heat until it starts foaming. You want that pan genuinely hot before the livers go in; that sear is what builds the deep flavor.
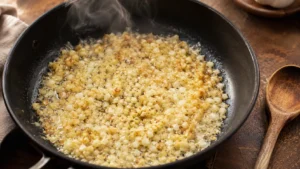
Step 3: Cook the Shallots and Garlic First
- Add your shallots and garlic to the pan, reduce heat to medium, and cook about 3 minutes until softened. They should smell incredible by now, sweet and a little golden at the edges.
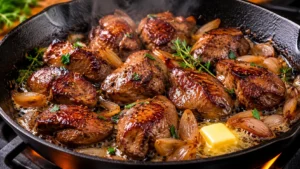
Step 4: Sear the Livers
- Push the shallots aside and add the livers in a single layer. Cook about 2 minutes per side, you want them browned outside but still just slightly pink inside. Overcooked livers taste gritty, and we’re not doing that.
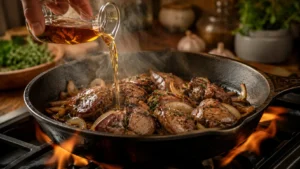
Step 5: Add the Brandy (Carefully!)
- Pour in your brandy and let it sizzle and cook off for about 1 minute. If you’re brave, you can carefully tilt the pan to flambé it, but honestly, just letting it reduce works perfectly fine too.
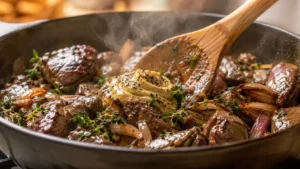
Step 6: Season and Add Thyme
- Stir in the thyme, salt, pepper, and Dijon mustard right in the pan. Everything should smell absolutely wonderful at this point. Give it one last stir and pull the pan off the heat.
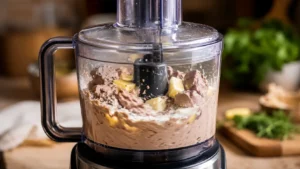
Step 7: Blend Until Silky Smooth
- Tip everything into your food processor, add the remaining 6 tablespoons of butter and the heavy cream, then blend for a full 2 minutes. I always blend longer than feels necessary; that’s the secret to the smoothest texture.
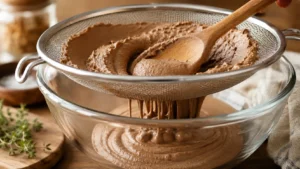
Step 8: Strain for Extra Silkiness
- Press the blended mixture through a fine mesh strainer using the back of a spoon. This step feels tedious, but it’s what gives you that truly refined, restaurant-quality result. Don’t skip it.
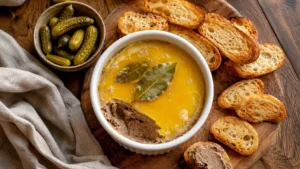
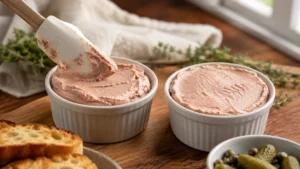
Step 9: Pour into ramekins and chill
- Spoon the pate into your ramekins or serving dish and smooth the tops. Refrigerate uncovered for 30 minutes while you prepare the butter seal.
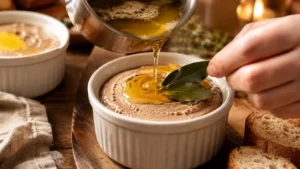
Step 10: Seal With Clarified Butter
- Gently pour a thin layer of clarified butter over the top and nestle in a bay leaf or two. This seal keeps it fresh and looks gorgeous on a table. Chill for at least 2 hours before serving.
Notes
I always make this a day ahead. Honestly, the flavor the next morning is so much deeper and is worth every minute of waiting.